Christmas Antler Stocking
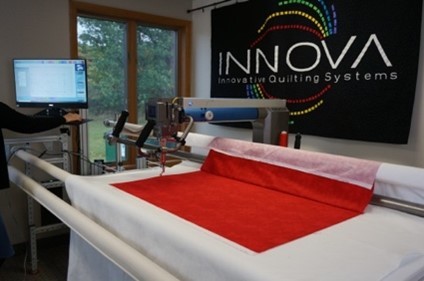
Create this fun Christmas Antler Stocking using your INNOVA Longarm and AutoPilot Mach 3 with Grand Format Embroidery!
This Christmas Antler Stocking can be customized or personalized using exclusive and patented tools in AutoPilot Mach 3 and Grand Format Embroidery.
Make stocking singles or flip the pattern and create a "pair" for a special couple.
Lets get started!
Gather your materials:
- 1 yard (40" wide) fabric - front and back of the stocking body (red)
- 1/3-yard (40" wide) flannel - stocking top cuff and antler (white)
- 12" x 6" fabric for lettering (green)
- 12" x 36" Appli-Stick fusible sticky backed applique webbing
- 3/4-yard (40" wide) batting
- 3/4-yard (40" wide) lining fabric
- 1/4-yard x 1" wide cotton strap webbing for hanging loop
- Thread
- Coordinating thread for crosshatching (red)
- Coordinating thread for antler (cream)
- Coordination thread for lettering (black or green)
- Download the Christmas Antler Stocking AutoPilot Mach 3 Project file here.
- Download all the AutoPilot Mach 3 .PAT pattern files here.
Prep:
Cut a 10" x 12" piece from one side of the flannel, in this tutorial we are using white flannel.
Cut a 12" x 30" piece of Appli-Stick Fusible webbing and iron it onto the remaining 12" x 30" piece of flannel.
Iron the remaining 12” x 6” piece of Appli-Stick fusible webbing to the lettering fabric.
Instructions:
Load the backing and batting
Open the one yard of fabric and fold right sides (selvages) together, lay the fabric sandwich on the longarm with the fold towards the back of the machine.
Baste along the fold.

Lift and flip back the top layer of fabric letting it rest on the top take up bar making sure the extra fabric does not interfere with the machine movement. Baste the remaining edges to secure in place.

![]()
Using Autopilot, create a sew zone slightly wider than the fabric, and set the quilt size to 36-inches wide by 20-inches high.
Position the Antler Stocking project patterns so the project will sew-out on the fabric.
Dequeue all patterns.
![]()
Create a crosshatch field set at 2” and 90○ to cover the Stocking pattern area.
Stitch the Crosshatch pattern using coordinating thread and 8 stitches per inch.
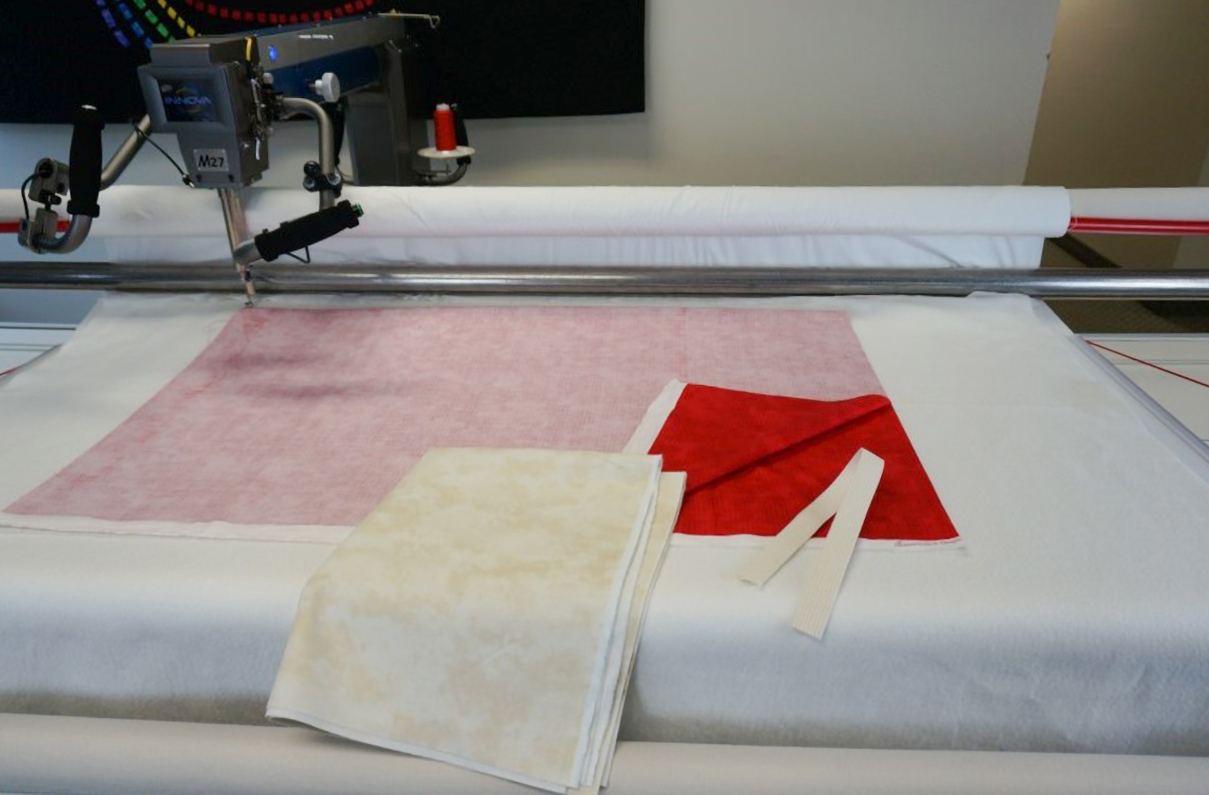
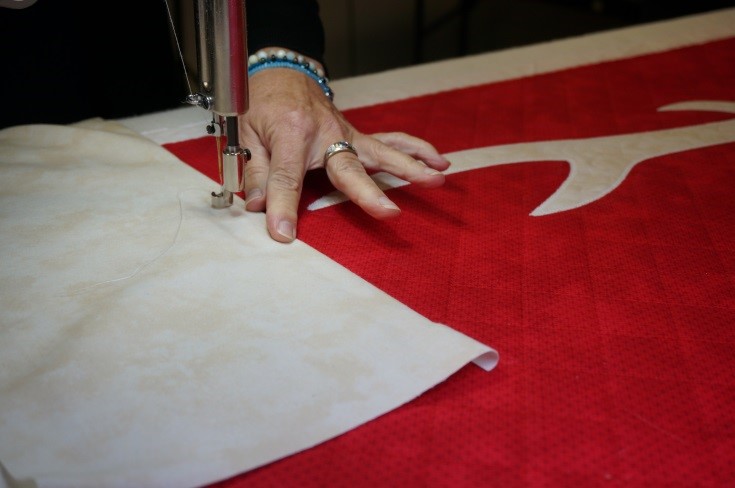
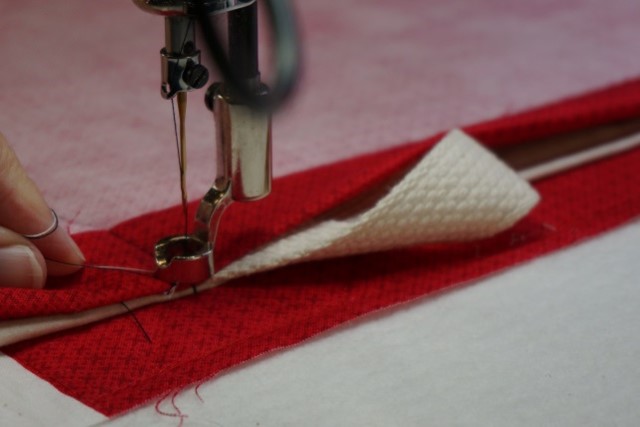
Place prepared antler fabric, paper side down, on the fabric where the antler pattern is positioned to sew out. Do not peel the paper off. Use your sewhead to ensure proper fabric placement. Secure edges with two to four straight pins.
Ensure pins are not in the sew path of the antler pattern!
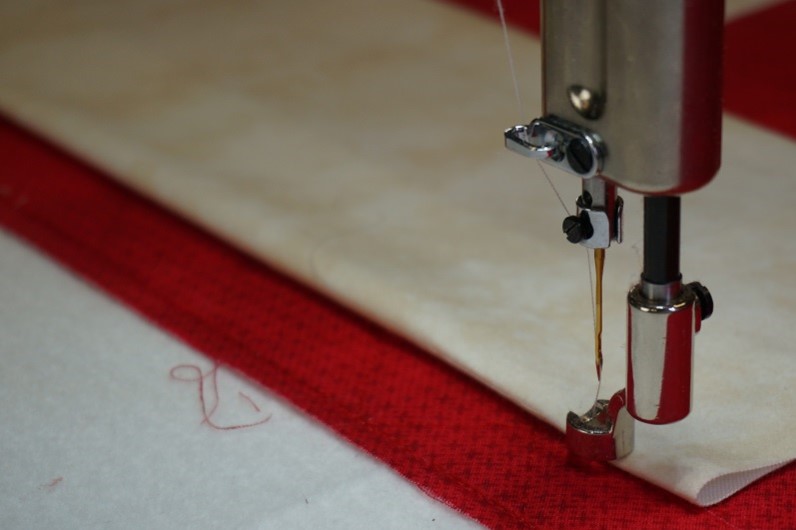
Remove thread to just before the take up lever.
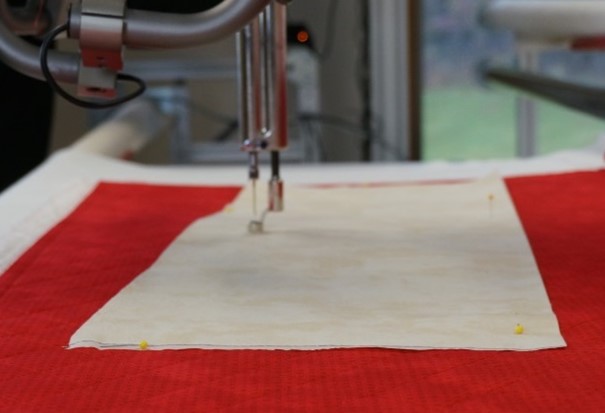
Queue antler pattern and “paper-punch” (stitch without thread) at 10 stitches per inch.
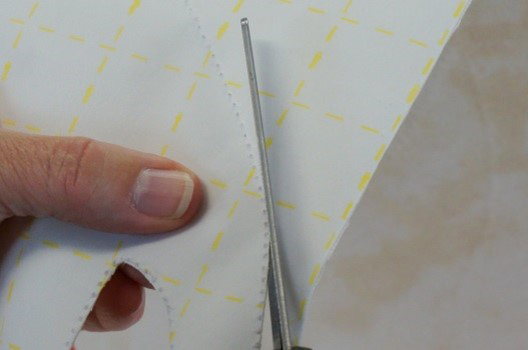
Remove the securing pins and cut the antler along the paper punched holes. For best results cut just next to the holes rather than through them.
Rethread the machine with cream thread.
Queue and stitch the antler pattern to create a placement line.
Peel the paper from the cut antler and carefully place the antler applique.
![]()
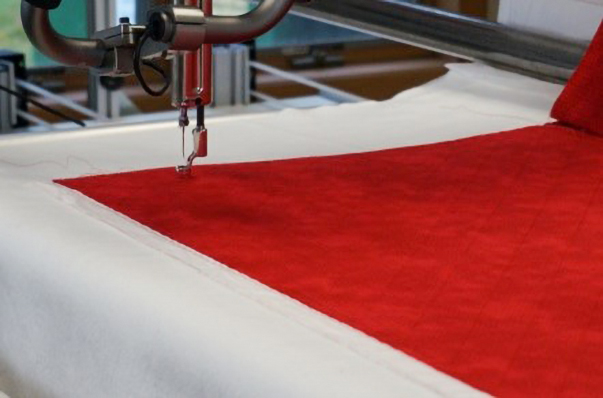
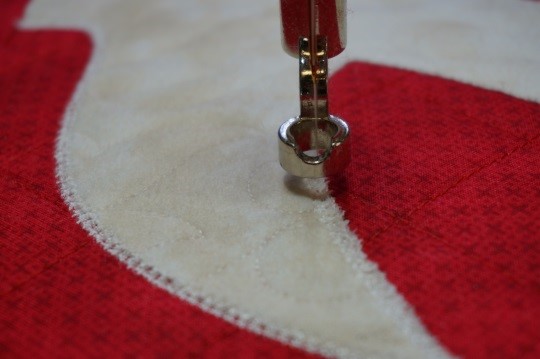
Using the mask tool, create a pattern to fill the antler.
Stitch the antler fill pattern at 14 stitches per inch.
![]()
Using the antler pattern, create a Path Apply embroidery pattern.
Stitch the Path Apply pattern.
Queue the lowest cuff line pattern (furthest left).
Place the 12” x 10” piece of white flannel, right side down, making sure to leave about a ½ inch seam allowance to the right of the lowest cuff pattern line.
Stitch cuff line at 8 stitches per inch.

Fold cuff fabric to the right so fabric is now right side is up and finger press.
Stitch the second cuff line pattern (lower “top-stitch” line).
Measure and fold the top edge of the cuff under at 6 1/2”.
Stitch the third cuff line pattern (uppermost or furthest right).
Follow the video above to create customized lettering using the Draw tool in AutoPilot Mach 3.
Place one 4” x 6” piece prepared lettering fabric, paper side down to cover “J” pattern. Carefully pin in place.
Ensure pins are not in the sew path of the “J” pattern!
Remove thread to just before the take up lever.
“Paper-punch” the J pattern (stitch without thread) at 10 stitches per inch.
Remove the securing pins and cut the “J” applique along the paper punched holes. For best results cut just next to the holes rather than through them.
Queue the “J” pattern, thread machine, and stitch placement line. Peel paper from back of cut out “J” and place “J” applique.
Create Path Apply using J pattern.
Stitch “J” Path Apply pattern.
Repeat steps above for pattern “O”, and again for pattern “Y”.
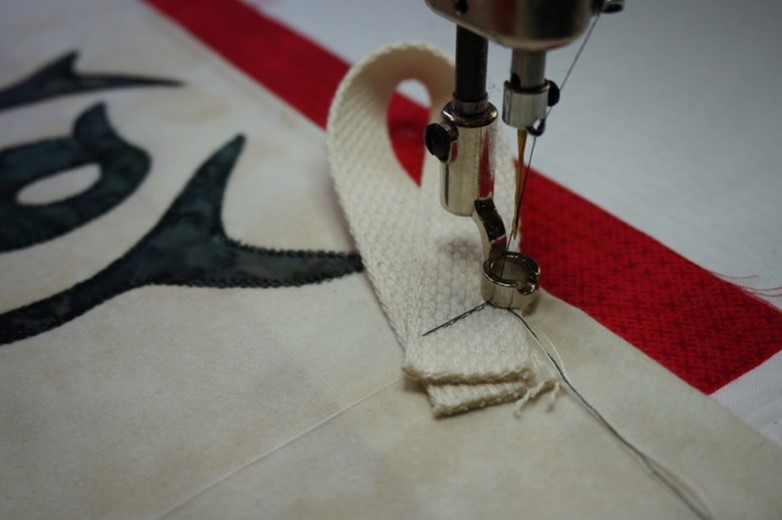
Fold the 9” piece of strap webbing in half to create a loop.
Place the loop in towards the stocking body with the webbing ends over the stocking outline pattern.
Secure the ends of the webbing along the stocking outline pattern.
Pull the top-half of the fabric back over the stocking so you have right-sides facing. Cut a ~2-inch slot just below the top basting line, and fold to align with the cuff, as pictured below. Again, carefully place pins out of the sewing path to secure the fabric in place.
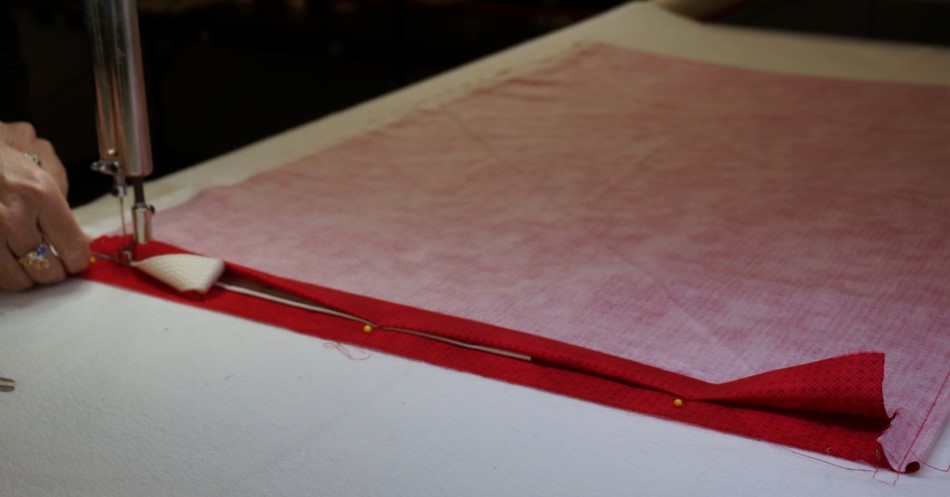
Stitch the stocking outline pattern, decreasing sew-speed before stitching.
Using a low sew-speed to start the outline will allow you to support the fabric as the machine passes through the thickness of the loop.
After the loop is stitched, sew speed can be increased.

Remove project from frame and cut ¼ inch outside stocking outline pattern. Carefully trim under the top edge of the cuff and clip the curves for best results.
Turn stocking right-side out and enjoy!

When you subscribe to the blog, we will send you an e-mail when there are new updates on the site so you wouldn't miss them.
Steps to get your Free 14 Day Trial for AutoPilot™ Simulator:
- Get your serial number by clicking here, fill out the form and hit the SUBMIT button.
*Your serial number will arrive in the email you provided. Check your junk folder if you do not see it right away. - Download the AutoPilot Mach 3 Simulator Free Trial Version here.
*You will need a minimum of Windows 8 pro 64bit. - Follow the prompts to install and activate the simulator with your provided serial number.
*If you get a message saying MSFT Defender is protecting your computer, click more and run anyway. - Enjoy your AutoPilot™ Mach 3 Simulator Free Trial Version for 14 days, then contact your local INNOVA dealer to order your new AutoPilot™ Mach 3 and enjoy those features for the lifetime of the product!
Disclaimer
License and Disclaimer of Warranty Information By downloading, wiring to or using the AutoPilot Simulator program and hardware, you acknowledge acceptance of the following DISCLAIMER OF WARRANTY: DISCLAIMER OF WARRANTY ALL THE COMPUTER PROGRAMS AND SOFTWARE ARE SOLD "AS IS" WITHOUT WARRANTY OF ANY KIND. WE MAKE NO WARRANTIES, EXPRESS OR IMPLIED, THAT THEY ARE FREE OF ERROR, OR ARE CONSISTENT WITH ANY PARTICULAR STANDARD OF MERCHANTABILITY, OR THAT THEY WILL MEET YOUR REQUIREMENTS FOR ANY PARTICULAR APPLICATION. THEY SHOULD NOT BE RELIED ON FOR SOLVING A PROBLEM WHOSE INCORRECT SOLUTION COULD RESULT IN INJURY TO A PERSON OR LOSS OF PROPERTY. IF YOU DO USE THEM IN SUCH A MANNER, IT IS AT YOUR OWN RISK. THE AUTHOR AND PUBLISHER DISCLAIM ALL LIABILITY FOR DIRECT, INDIRECT, OR CONSEQUENTIAL DAMAGES RESULTING FROM YOUR USE OF THE PROGRAMS OR FROM CONNECTING IT TO YOUR MACHINE.
The computer programs AutoPilot™ Simulator are Copyright © 2019 of Neal A. Schwarzberger and ABM International, Inc.. AutoPilot™ Simulator is a trademark of ABM International, Inc. AutoPilot™ Simulator is a proprietary product, its concept, design and functionality are Property of ABM International, Inc.