Spring is here and we are so excited to share this fun and adorable table runner project with you! Thank you, Corey Yoder, for the petal inspiration! We made our table runner using Picture Perfect by American Jane. Follow along in our tutorial to see how to make the Petal, Cheer Me Up! Table runner using your INNOVA Longarm with AutoPilot Mach 3 and Grand Format Embroidery.
Let’s get started!
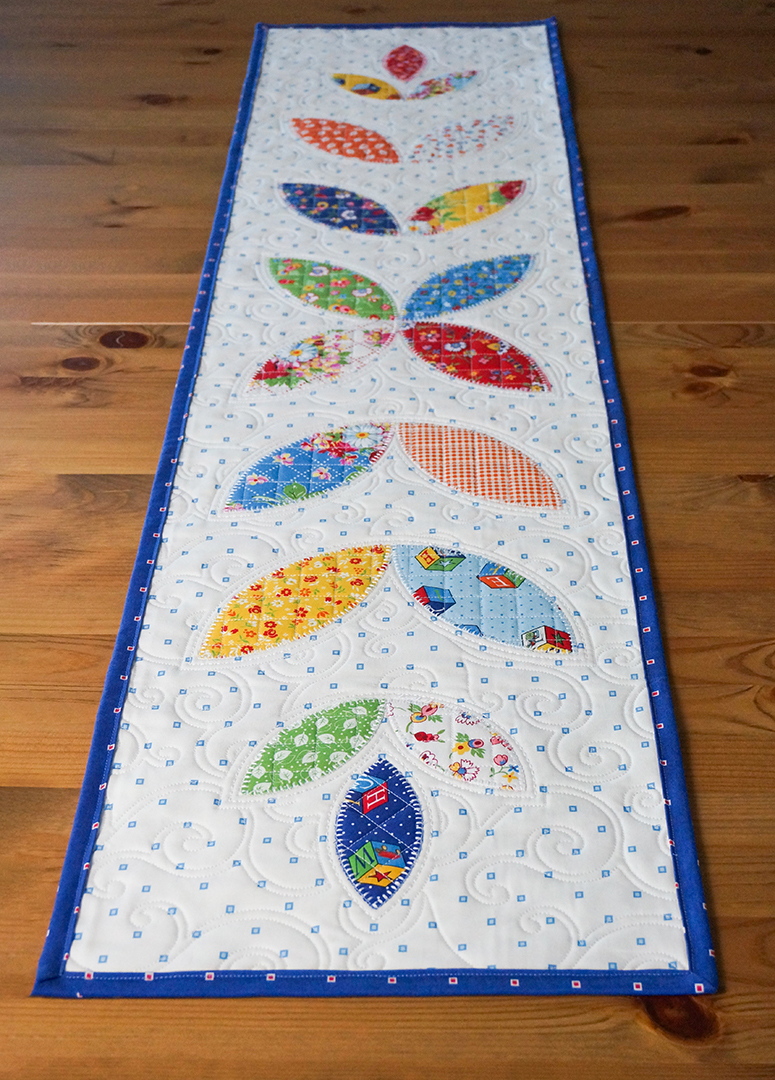
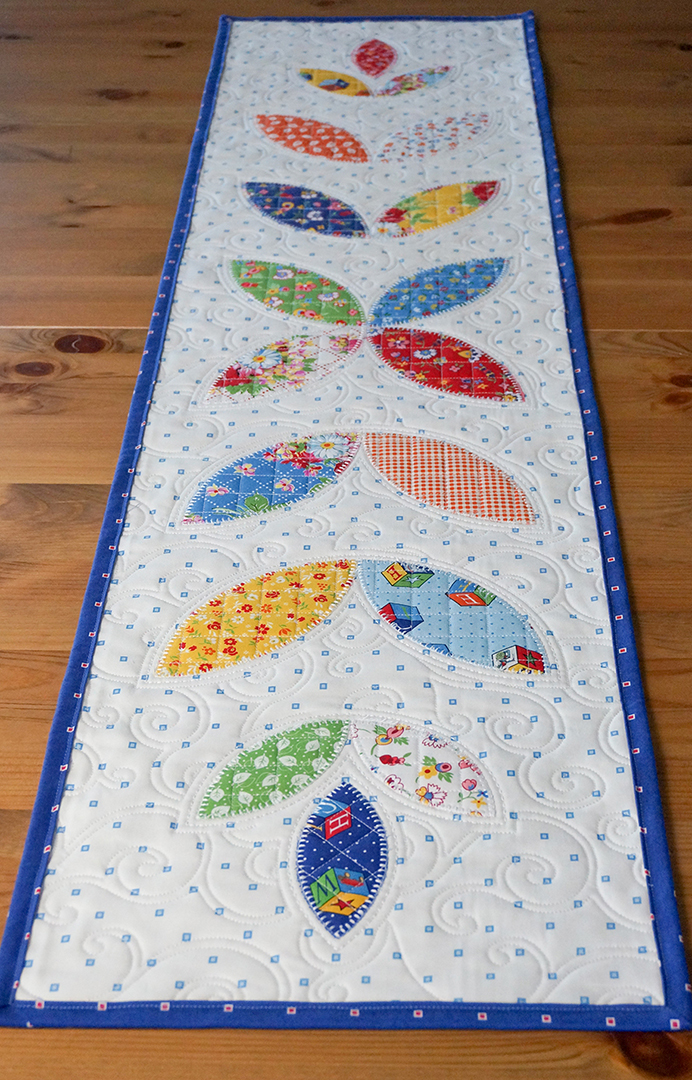
The finished table runner is 52” x 12.5”
Project:
If you haven’t already, head over to our online store to get your FREE Petal, Cheer Me Up! project file!
If you don’t want to miss out on new projects be sure to subscribe to receive notifications at the bottom of this tutorial!
Fabric:
We used coordinating fabrics from our Picture Perfect Wingtip Elegance kit or you can choose your own.
See all the fabrics available here.
The Wingtip Elegance kit includes:
1 – Layer Cake (40 – 10” squares)
2 yards of Coordinating Light Fabric
¾ yards of Coordinating Dark Fabric
Other Supplies needed:
60” x 18” Batting
INNOVATECH Thread in Pearl
Iron – we used our Oliso HOT Iron!
From the fabric included in the Wingtip Elegance kit, you will need:
60” x 18” Light fabric for table runner top
60” x 18” Light fabric for table runner backing
¾ yard Coordinating dark fabric, cut into 2” strips for binding.
18 – 5” x 5” Coordinating assorted fabric squares
Hang onto leftovers for future projects coming your way!
Prep your applique fabric:
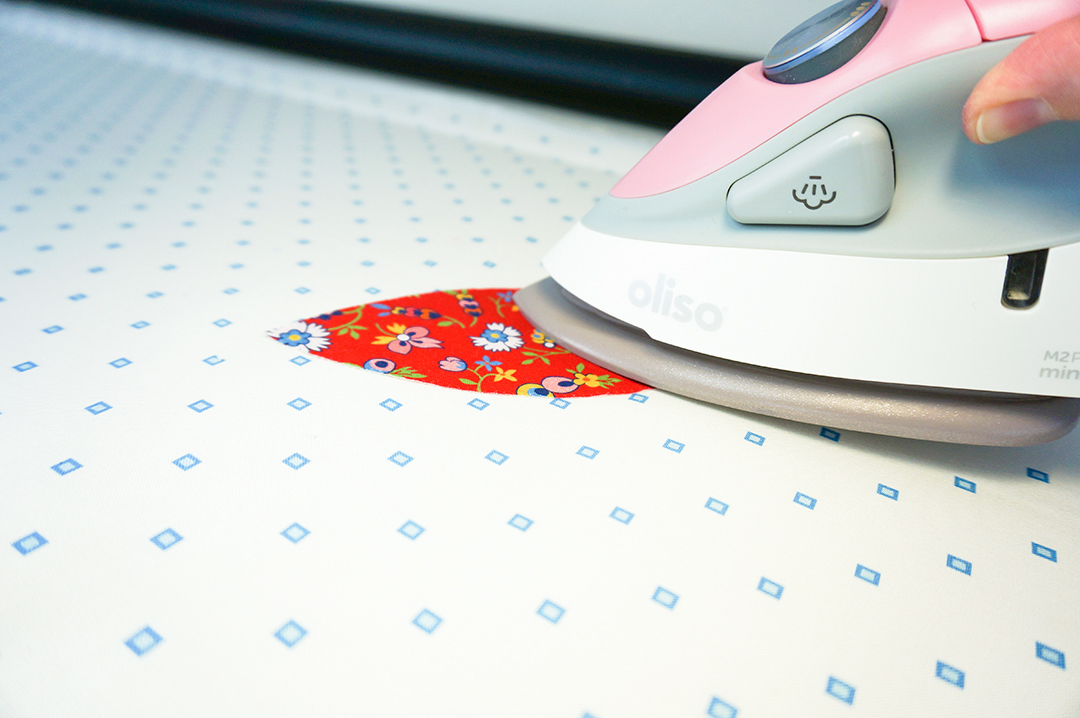
Iron Appli-stick fusible webbing onto the wrong side of the 18 5” x 5” fabric squares.
Load your INNOVA Longarm:
Load your fabric and batting onto your INNOVA Longarm.
Open your ABM Petal Runner project file in AutoPilot Mach 3.
We started in the center of our fabric and worked outward.
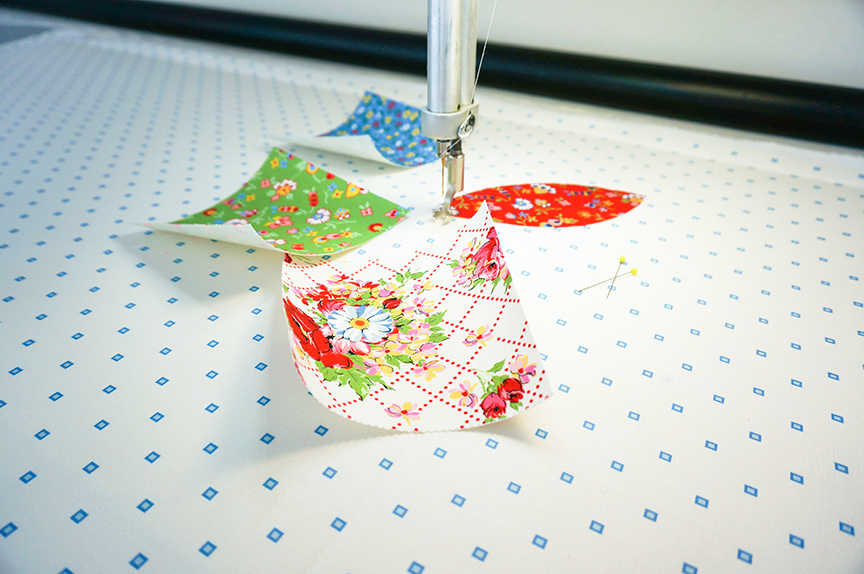
In the center pin a 5” square in place making sure the sewhead wont hit the pins.
Run the petal pattern with no thread to paper punch your fabric.
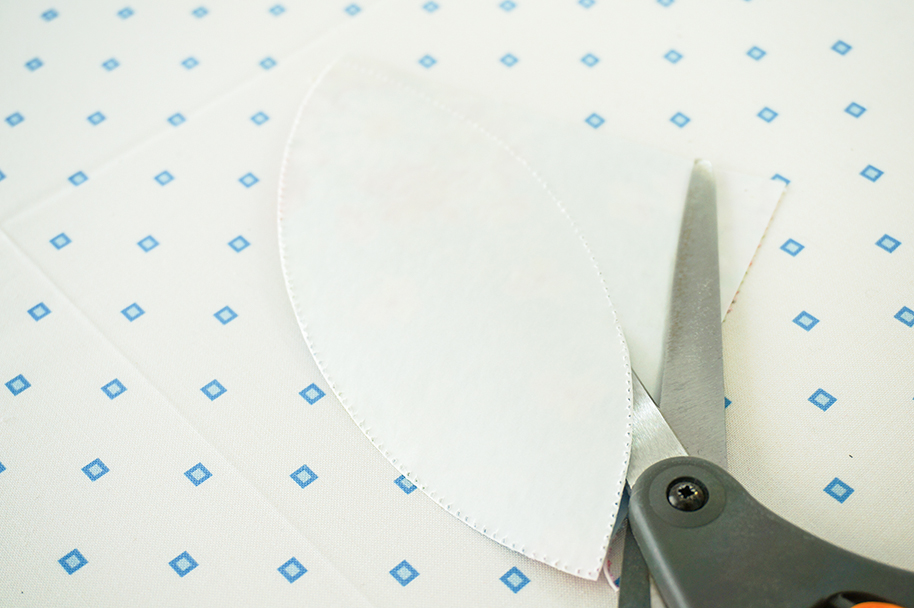
Cut your fabric just outside the paper punch holes.
Remove the paper backing and place the fabric using the needle holes to line up.
If you can’t see the holes, run the pattern with thread for a placement line.
Stick the fabric down and iron to secure in place.
After you secure your fabric, queue and run the crosshatch pattern at 10 stitches per inch.
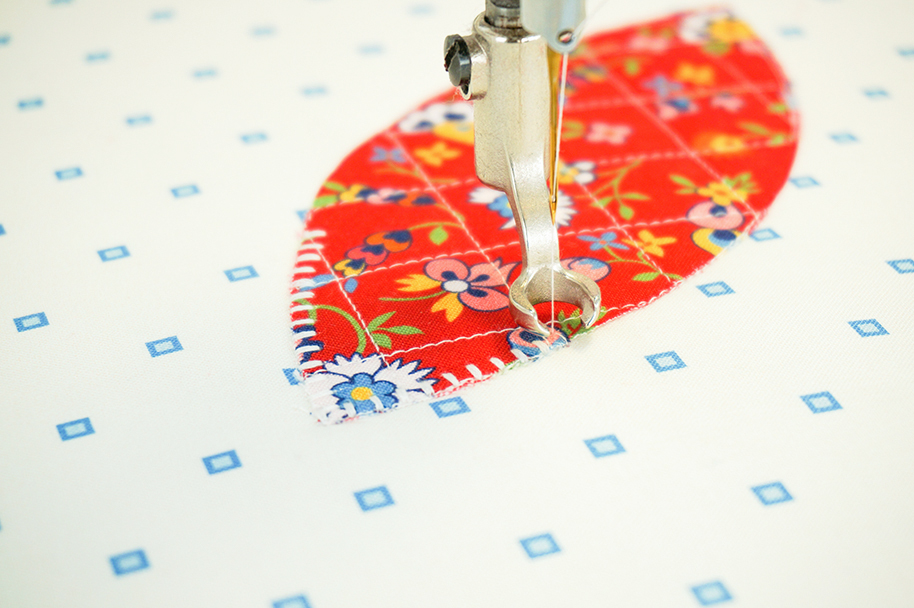
Next, run the ABM 109 Blanket Path Apply pattern.
Continue the steps above to complete the four center petals.

After you complete the center four petals, run the ABM 111 Shashiko Path Apply Pattern.
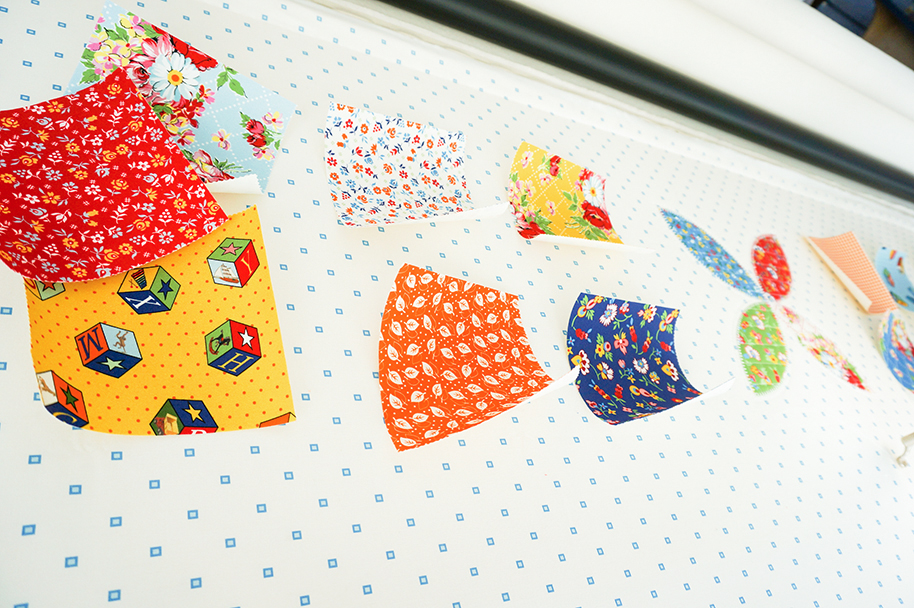

Follow the steps above to complete all the petal pairs, starting with the left side, then the right side.
![]()
After all applique petals are complete, use the echo tool to echo the pattern .25 for each set.
![]()
Use the echo petal pattern to mask a background pattern of your choice using the Mask tool.
In the Mask Tool settings choose mask inside. Mask each repeat individually for best results.
We have included a rectangle pattern that you can use as an outside mask if desired. In the Mask tool settings choose mask outside.
Remove the table runner from the frame and trim to 52" x 12.5" .
Bind the table runner with your preferred binding method using the coordinating dark yardage or binding of your choice.
Enjoy and stay tuned for more projects!